Warning, Area of Burnout Ahead
Author: Mark Parkinson BsPharm: President AFC-CE
Credit Hours 3 - Approximate time required: 180 min.
Educational Goal
Tell In-Home caregivers how to avoid Caregiver Burnout.
Educational Objectives
- Define Caregiver Burnout.
- Tell how to make a personalized plan of action to prevent caregiver burnout.
- Introduce the concept of Coping Chemicals and how to manage them.
- Define stress and tell how to manage it.
- Explain how Expectations lead to caregiver burnout.
- List other factors that affect caregiver burnout.
- List things that can give you caregiving endurance and strength.
Procedure:
Read the course materials. 2. Click on exam portal [Take Exam]. 3. If you have not done so yet fill in Register form (username must be the name you want on your CE certificate). 4. Log in 5. Take exam. 6. Click on [Show Results] when done and follow the instructions that appear. 7. A score of 70% or better is considered passing and a Certificate of Completion will be generated for your records.
Disclaimer
The information presented in this activity is not meant contraindications may be of concern. All applicable manufacturers’ product information should be reviewed before use. The author and publisher of this continuing education program have made all reasonable efforts to ensure that all information contained herein is accurate in accordance with the latest available scientific knowledge at the time of acceptance for publication. Nutritional products discussed are not intended for the diagnosis, treatment, cure, or prevention of any disease.to serve as a guideline for patient management. All procedures, medications, or other courses of diagnosis or treatment discussed or suggested in this article should not be used by care providers without evaluation of their patients’ Doctor. Some conditions and possible
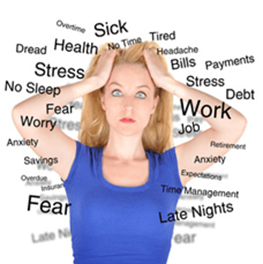
Warning, Area of Burnout Ahead
When talking with others about Adult Foster Care and in-home caregiving, I have described it as the most difficult, Easy job that there ever was. It is not physically demanding, you never have a huge patient load (max 5 per house), it is not intellectually challenging (the doctor is supposed to do all the brain work), and talk about the perfect workplace- it’s your own home for goodness’ sake. So why do Adult Foster Care homes close after about 5 years? Why do employees of care homes last even less time in the business? If it is so easy, why do you feel so exhausted all the time? Physically, mentally and emotionally exhausted.

Caregiver Burnout
Almost all In-Home caregivers have to face a thing called Caregiver Burnout. According to the website WebMD.com, caregiver burnout is defined as-
“Caregiver burnout is a state of physical, emotional, and mental exhaustion. It may go along with a change in attitude -- from positive and caring to negative and unconcerned. Burnout can happen when you don’t get the help you need, or if you try to do more than you’re able -- either physically or financially. Caregivers who are "burned out" may have fatigue, stress, anxiety, and depression. Many caregivers also feel guilty if they spend time on themselves rather than on their ill or elderly loved ones.”
Did you find that definition beneficial? Neither did I. It is too broad in scope making it almost totally useless for Adult Foster Care providers. You can tell that the writers over at WebMD have never spent 3 days, let alone three years of their life being constantly “on duty” never being able to get away to a place totally separate from their caregiving responsibilities. In other words, I doubt if the writers have experienced Caregiver burnout like adult foster care providers do. To appreciate the topic better we are going to need a more adult foster care-focused definition.
 Death by a Thousand Paper Cuts
My definition of caregiver burnout is the death of the soul by a thousand paper cuts. Every adult foster care provider starts off with hope and enthusiasm. Look at me. I have found a way to make a living by doing something good. Keeping those who can’t take care of themselves from getting institutionalized. I also get to work in a very homey and comfortable environment. No more big businesses telling me what to do and a boss who doesn’t care about me. I can’t believe I am going to get paid for just doing activities of daily living in my home. This is my dream job.
Then reality sets in. The state comes in and says do this and don’t do that. The families of the residents look down their noses at your efforts. You realize that you have a total lack of privacy. Doctors and nurses assume you’re an idiot or don’t see you at all. You suffer through night after night of interrupted sleep, pooped pants, peeing in beds, and wandering residents. Mind-numbing boredom set in as you are required to do the same chores day after day week after week after week. You are tied to the house and get socially isolated. If you are unlucky you have to face the worry of having months on end of not getting enough income because a resident moved out or died. Then comes the dreaded day of the state relicensing inspection. A total stranger comes into your home and judges everything that you have done over the past year.
Individually each problem and task are small and easily handled. But stack them all on top of each and you’ve got a lot of stress that can build up. You seem to be responsible for doing everything. A slave to everyone's whims and demands. Taking care of yourself always seems to be less important than taking care of everyone else’s needs. Being responsive and submissive to the client’s needs feels like you have become their doormat instead.
Month after month you look on and watch your strength and enthusiasm slowly leak away. There is no escape from the pressure. You can’t go home and leave your work troubles at work. Your home is the workplace. You worry about everything all the time, even when you are away from the residents. Vacations to rejuvenate your spirits are what other people do. There seemingly is no escape from stress. Year after year you devolve from enthusiasm, to struggle, to trying to just endure and finally burn out and barely care anymore. Extended In-Home caregiving can really suck the life out of you.
It’s inevitable, In-Home caregivers will get burned out--- unless you do something about it. I have lived the adult foster care life and walked the In-home caregiver walk. After over 15 years in the caregiving trenches, my wife and I have looked the stress monster in the face and got scorched several times. But over the years we’ve also learned a few things about surviving the burnout. Hopefully, I can help you face the stress monster and have enough fortitude to spit into its eye.
The Plan of Action
Sorry I went all doom and gloom on you. I felt I had to emphasize the point that In-Home caregiving requires a lot of fortitude. Of course, you know that already. Only those who have been in the caregiving trenches like you can appreciate just how much energy it takes. And by energy, I include emotional fortitude and financial wherewithal. What you may not appreciate is, that no matter how much “energy” you start with, if you do not have a specific plan of action to conserve it or replace it, you are going to run out of the energy that keeps you going.
So, what are you going to do about it? In my mind, it simply comes down to putting extra effort into two things. 1. Purposely and consistently do good things that give you resilience and strength. 2. Recognize the things that drain you and purposely manage them to minimize the drain of energy. You cannot count on these two efforts to automatically happen by themselves. You must have a plan of action. It’s like putting your foot on the gas pedal. If you take it off, your fortitude engine runs out of fuel, and you coast to a stop.
Ok, you’ve got to develop a plan of action. What goes into this plan? This is where it gets tricky for me to write about. Each home is a unique situation with its own set of requirements, struggles, and strengths. It is neigh to impossible for me to develop a “one size fits all” program for you to follow. So, I am going to give you the tools to write your own plan of action to keep the caregiving burnout monster away.
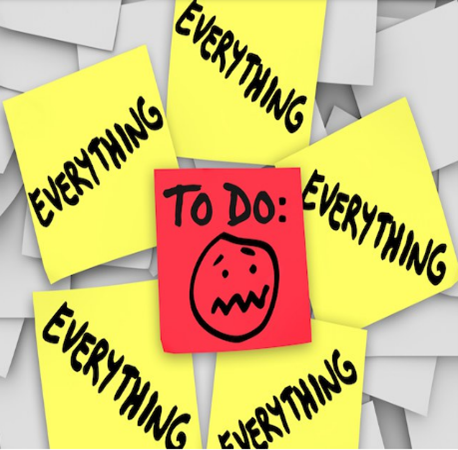
The “To Do” list
 Do this exercise for me. On a piece of paper write down what thing brings you joy. What gives you peace of mind? What makes you happy? Take your time and really think about it. Keep reviewing and adding to the catalog of positive things for at least a week, or even a month. I will give you some suggestions as we go through this lesson. At the same time, I want you to write on a separate piece of paper all the things that annoy you. What do you hate to do? What are the things that throw you out of balance? I am going to talk about a few things that you may not have considered. Take just as much time on this one as well. As you write your catalog of negative things ask yourself, “What can I do to manage or eliminate the stressors”? I am going to give you some suggestions about that too.
Now take both catalogs and turn them into “To Do” lists. Think of each item on both catalogs as a list of goals. The “To Do” list will be items that help you work towards accomplishing those goals.
Tah Dah- you have just made a Plan of Action to fight burnout that is totally customized for your own unique caregiving situation. Work on the list daily and take satisfaction in crossing off each item. That alone will give you a sense of accomplishment that will rejuvenate your soul. When the list gets small, refer back to your positive and negative goals and then make a new To-do list. Some things you will write over and over again. That’s okay if you repeat yourself. You are still purposely and continually putting effort into keeping the monster at bay.
Is the catalog of goals going to change over time? It had better change. Life changes and you are going to get better at the In-Home caregiver thing. Some items will become more important, some things will become less stressful because you are now more skilled. If your goals don’t change then you are not being specific enough, or you are not getting more skilled, or you are just not putting enough effort into it. Speaking of that, is this all worth the effort? You bet. You are going to retain your dream job or keep your business going. You are working on the very things that are going to keep you energized, sane, and in business for the long haul.
Building a more Focused and Detailed Plan
Regardless if you follow the To-do list strategy or not, you must understand the underlying principles that cause burnout in caregivers. Once you have a good understanding of the causes you can construct a more detailed oriented, principle-driven plan. A plan that is more flexible yet durable. A program that will be able to grow and mature as your career in In-Home caregiving grows and matures.
Coping Chemicals
 Everyone is born with a biological system that enables the body to protectively respond to the stressors of life. That system in turn is controlled by the nervous system. Which is, in its turn, controlled by a multitude of neurotransmitter chemicals and hormones. I simply call the whole thing the body’s Coping Chemicals. We use up some of our internal stores of coping chemicals as we deal with the stresses of life. The body then replaces what was used up and we are able to continue facing the pressures that we experience. But, what happens when the stresses of life use up more coping chemicals than can normally be replaced? The system starts to malfunction. Little by little we start to lose our ability to respond appropriately. We start to lose some of our resilience. Recovery from hits to our psyche takes longer and longer to achieve. We start to get mad more often. We feel more exhausted, and we lose the ability to care about anything. We can’t help ourselves. We simply don’t have enough coping chemicals left to elicit the correct protective responses.
Signs that we are running out of Coping Chemicals.
 Having less energy than you once had.
- Lowered immunity. (Catching every cold or bout of flu that’s going around.)
- Feeling constantly exhausted, even after sleeping or taking a break.
- Don’t care about taking care of your own needs.
- Gets little satisfaction in your caregiving.
- You have trouble relaxing, even when help is available.
- Become easily irritated, frustrated, or angry with others.
- Feeling helpless and hopeless.
- Unable to concentrate or have trouble making choices
- Withdraw from friends and family
- Have lowered self-esteem
- Feeling like you’re in over your head and everything is going wrong.
If you continue down this path you will literally make yourself sick, emotionally and physically sick. You’ll turn into a very grouchy or uncaring individual. The quality of your caregiving will drop. The danger of neglecting or abusing the very people you are trying to take care of will increase over time. Eventually, you will quit or be forced to quit the profession. If you start to experience the signs, then you know you are running out of coping chemicals. You will need to do something about replacing what has been lost.
How to get more Coping Chemicals
- Healthy diets- This principle is easily understood. You must have enough of the right materials in your diet if you are constructing more coping chemicals. That means consuming a nutrient-rich diet. In adult foster care homes this will happen automatically if you cook from scratch. Remember to include plenty of fruits and vegetables in your menu plan. I’ll talk more about food later on.
- Good Bacteria- Research shows a connection between the good bacteria in your gut and mental health. Eating probiotic foods like sauerkraut, yogurt, pickles, buttermilk, and kefir may help your mental resilience.
- Supplements- Taking a multivitamin helps ensure you your getting enough nutrition. Normally as a pharmacist, I do not recommend stress formula vitamins. I think a proper diet and a multivitamin is enough. But if you are in great need, then a stress formula may be justified. The same principles apply to probiotic (good bacteria) supplements.
- Relaxation and proper sleep are restorative. They give the body time to replenish its coping chemical stores. That means purposely scheduling naps and “me time” in your daily schedule. If you are forced to lose sleep at night, then increase the naps to compensate. You are looking for at least 7 hours of sleep per day. If you do not have someone to watch while you nap, purchase a baby monitor system.
- Exercise- Physical activity increases the release of endorphins, the body's “feel good” coping chemical. It also distracts the mind and helps it to relax. It is well understood that a strong body is more resilient and immune to stress. I liked taking walks with the residents to get my exercise. Gardening is also good and lowers the food bill at the same time. I also think that purchasing a treadmill or exercise bike is justified in Adult Foster Care homes. Purposely include such activities in your action plan.
- Surprisingly, getting enough sunshine is also helpful in restoring coping chemicals. If you can’t get outside, light therapy lamps are designed to mimic the sun for its benefits.
Stress
Stress causes burnout- sort of.
Another underlying principle I think you need to understand is, what is stress? There are many different definitions of the word stress. I like the Mental Health Foundation’s definition. “Stress is our body's response to pressure…. It is often triggered when we experience something….” In regards to this course, stress is a coping chemical response. It is our control system trying to motivate us to do something. Once we start to do something, the need for motivation is lessened and we feel less stress. Of course, if the situation does not improve then the stress response continues, taxing our other coping chemical reserves. So, excessive and/or chronic stress causes caregiver burnout. But it is not the root of the problem. To control burnout, you must work on the events that create the need for the stress response. It’s the old “a stitch in time saves nine”. As you think about your burnout prevention plan of action, run your life, your business, and your career in a way that you don’t need to be motivated to do something.
I hope that most of you are getting the implications of what I am saying. It means changing the way you look at things. As you make your list of things you hate or the things that stress you out ask yourself, Why? What are the underlying reasons? Take time to peel back the onion layers and be honest with yourself. You must find the root of the problem.
Let me give you a few examples.
State inspections cause stress. Or more accurately being unprepared for state inspections causes stress. If you are 1. unknowledgeable about state regulations concerning AFC homes or 2. You are unwilling to sacrifice certain things in your personal life or 3. Are just too lazy to comply with the regs, then you will experience a lot of stress at inspection time. If you don’t do something about being prepared, that stress will eventually wear you down. So being prepared for the inspection becomes the goal.

Now the “to do” list item. Learn from the state inspector.
If it was me, I would not view the state inspector as a punisher, a giver of stress. I would view them as an expert on state regulations. Utilize them as a teacher, instructing you how to comply with the regs. That changes them from a drag on your coping chemicals to a resource that can eliminate the need for the motivation to act. They can, if properly used, actually reduce your stress. Also, easily passing an inspection is a great source of pride and satisfaction. Both feel pretty good if I do say so myself. Feeling good increases your coping chemical reserves.
Chaos causes stress. Or more accurately being unorganized creates multiple events that cause the need to act. That stimulates multiple stress responses. So, the goal is to experience less chaos.
The “to-do” list. Get organized
If it were me, I would put a lot of effort into regulating the daily activities of the home. Create a schedule of chores to accomplish. Daily, weekly, and monthly. The idea is to know in advance what needs to be done, who needs to do it, and when it needs to be done. Calendar events. Write important stuff on a calendar so you can be prepared in advance. Write a menu so you will know what needs to be prepared and what items you need to purchase. Can you see how that eliminates the need to be motivated to act? Being organized reduces stress and fights caregiver burnout. Less stress from less mess. Sounds like a good saying to put on a poster and hang it on a wall someplace.
Emergencies cause stress. Accidents and emergencies happen to everyone. Care homes are particularly vulnerable to traumas because of the reduced health conditions of their clients. The stress of the situation motivates you to act.
The “to-do” list. Emergency response procedures.
After an emergency, review the situation and think about how you could have had a better outcome. Then establish care procedures that tell what to do step by step. Well-thought-out procedures reduce the need for the “motivation to act” response. In other words, “Having the Trauma without the Drama”.
Accumulation of roles causes stress. In-Home caregivers tend to think they have to do EVERYTHING. While it is true that you are responsible for everything you are not required to DO everything. Can you see how making yourself act on everything multiples the stress response?
The “to-do” list. Delegate
Make a list of duties and make assignments. Clients, your family, and employees can do a lot of the menial things around the home. Clients get bored and need something to do. It also helps with their self-esteem if they have responsibilities. One thing I wish I had done when I had my AFC homes is hiring a cleaning service. Care home owners, do you want to make your care employees last longer in your employ, get a cleaning service.
Lack of Sleep Causes Stress
Wanting to sleep when you need to be awake is an automatic trigger for the stress response. You need to be motivated to get things done, stress is the body’s natural response.
The “to do” list -Keep track of sack time.
Having more time to relax and proper sleep is essential in preventing caregiver burnout. I think it is thee most important element of your plan of action.
Lack of knowledge causes stress. If you do not know how to do something, then the stress response continues unabated. You can reduce the stress by getting in the know. You don’t have to know everything but if something comes up on a regular basis or a client has an unfamiliar diagnosis it would be wise to get in the know.
The “to do” list- Educate yourself.
Seeking knowledge reduces stress in the future. Make a list of things you want to know and take advantage of the internet. Talk to experts. Read all my CE courses (a shameful plug for my service). Time educating yourself will pay dividends down the road and prevent burnout.
Not having enough resources is stressful. If you do not have the equipment or supplies handy, the task cannot be completed. A stress that cannot be resolved turns simple tasks into chronic stress issues.
The “to-do” list. Create an Inventory system.
List all the items that you normally use. Decide how much is needed, then keep that amount in the pantry. Utilize the -Use one, Buy one- purchase system to keep the supply levels up. You can take advantage of sales and buy more when the opportunity arises. In the long run that will lower the operating costs of the business and keep you well-stocked. You can add food supplies to your stored inventories. Deciding what is for supper is a lot less stressful if you have a well-stocked pantry.
Lack of Funds causes stress. You will notice that I did not write finances causes stress. Just the opposite is true. Money on hand reduces stress. It enables crossing off most items on your ‘to-do’ list. Money on hand solves problems. Readily available cash prevents emergencies from even occurring.
 The “to-do” list. Read Dave Ramsey’s Book- Total Money Makeover.
You have got to manage the money. If you do not know how to use a budget, you will get burned out. In-Home caregiving without money management is just too stressful. In his book, Mr. Ramsey says, to start with an emergency fund of $1000. Then work on eliminating short-term debt. In addition, build up your emergency fund to equal 3-6 months’ worth of money. You have to have money to cover your needs and bills if everything falls apart. Like having your clients die or move out. Then work on paying off the house. If it was me, I would add to the budget a place for personal mad money. Money that can be blown on anything you want without any other considerations. If you want something silly or stupid, then save up your mad money and get it without any stressful remorse.
I cannot cover all items that cause stress. I hope you got some good ideas from my Goals and “To-Do” list items that I wrote about. Did you see how I turned annoyances into items to work on? Get a good system going and you will greatly reduce the stress in your caregiving world. You will be more resilient if you put some effort into it.
Expectations
The third underlying principle that leads to caregiver burnout is how expectations affect our attitudes. Expectation is defined as the strong belief that something will happen in a certain way. It is a major part of why a person acts the way they do. When we expect things to have good outcomes, we tend to notice the positive aspects of our lives and ignore the negative. The opposite also occurs. Negative expectations lead us to notice only the bad.
Caregivers who have positive expectations are hopeful that things will turn out fine. Positive expectations encourage the caregiver to work past obstacles and chase dreams of success. They lead the caregiver to see things in a positive light. This encourages us to achieve happiness and fulfillment in our caregiving efforts. When someone says how are you say, “I’m a happy guy”.
Unfortunately, there is a danger in always expecting the positive to happen. Just expecting positive things to happen will not always make them happen in reality. When reality falls short of our expectations, disappointments are felt. The harder we cling to our positive expectations in the face of reality the greater the letdown. Continued letdown leads to disillusionment. Continued disillusionment leads to frustration which in turn leads to dissatisfaction. Continued dissatisfaction leads to negative expectations which in turn leads to caregiver burnout.

Gratitude
So how does a caregiver avoid this expectation vs reality burnout trap and still enjoy the good outcomes of a positive outlook? In a word Gratitude.
In an article from verywellmind.com Elizabeth Scott PhD said,
“When your expectations outpace reality, it often means you don't appreciate what you do have. Instead, you may find yourself expecting more or comparing what you do have to what you could have.
For example, one study found that participants who were exposed to a subliminal reminder of wealth spent less time savoring a chocolate bar and exhibited less enjoyment of the experience than other subjects who weren't reminded of wealth.
Gratitude is all about appreciating what you have instead of lamenting what you don't. Research has found that practicing gratitude and working actively to savor the moment can have a positive effect on subjective well-being and happiness.”
Being grateful for the blessings we obtain helps balance our expected outcomes with what reality actually gives us. It can embolden you to persevere in the face of adversity. It can enable you to be more resilient and have more stamina. I suggest that you look at gratitude as a caregiving tool. A technique that needs to be practiced and applied with skill. For example:
- Elizabeth Scott also suggested that “Spend a few moments each day thinking about something you are grateful for. Or consider writing in a gratitude journal.”
- Genuinely thank those around you for the things they do for you.
- If you pray, tell Heavenly Father how grateful you are for what He has sent you.
- Routinely step back and assess what is happening in your care home. List the good things but don’t ignore the bad.
- Frame the bad as “opportunities to learn” and be grateful that you have gained valuable insight into what not to do in the future.
Expectations of Those Around You
Now let’s look at how the expectations of your clients, your family and the support staff affect you the primary caregiver. No one exists in a bubble. We need the cooperation of those around us to have our expectations realized. Those who cling to their expectations the most, endeavor to control others to make their expectations into reality. That puts a lot of pressure on the main caregiver. When expectations are not met, frustration and anger follow, adding to caregiver stress. That is referred to by some experts as the “reality vs expectation trap”.
If you are at the receiving end of this frustration and anger, I would suggest that you put in efforts to manage the expectations of those who are dishing it out. Here are a few suggestions:
- Teach everyone about their role in the care home. Ensure that everyone knows who is responsible for doing what. Expectations will adjust by themselves if realities are clearly defined.
- Communicate effectively. Take time to really listen and ask probing questions. Repeat back what you hear to make sure of your understanding. Clearly express your expectations. Make sure they understand your goals.
- Establish reciprocity- I am going to do this for you, and I expect that you will do that for me. Together we will get what we both want. Thus, you have converted a detractor into a supporter.
- Educate everyone about the need for personal responsibility in fulfilling expectations.
- Help others avoid the “reality vs expectation trap”.
- Point out the positive that is happening in the lives of others.
 Reinforce gratitude in others by genuinely accepting compliments and returning thanks.
The Expectation of Caring for Close Family Members
One of the hardest things I know in In-Home caregiving is taking care of a close family member. Expectations force the caregiver to be the controlling caregiver and the submissive child or supportive relative. Often those roles are in opposition to each other and thus almost impossible to do at the same time. My suggestion is to view this problem as an expectation vs reality issue. Many of the above techniques will help in this situation. If you must choose which role to take, I think it is more effective to be the dominant caregiver first. Then add in moments of supportive relative to provide balance. What does that look like? Demanding compliance with your wishes then afterward giving them a hug and thanking them for their sacrifice to make things work. Then express your sincere belief that the outcome will be positive.
 People who have mastered the art of setting realistic expectations for themselves and others experience a healthier attitude and a more positive outlook on life. They become less demanding of others. As a result, they experience fewer disappointments and fewer frustrations. Caregiver stress is lessened, and the risk of burnout is reduced.
Other Factors That Affect Caregiver Burnout
There are so many other things that could affect your attitude or could cause you stress. I could not think of a way to combine them all under one underlying principle other than to call it the miscellaneous category.
Personal Health Issues
The longer I live on this planet the more I come to realize that there is no perfectly sane person out there. We all have to contend with the Crazy bits in our psychological makeup. Under normal conditions, we have learned how to compensate and get by despite our weaknesses. But under the constant pressure of 24/7 caregiving those mental health issues may start to poke out more. Don’t beat yourself up about it. Under these conditions, it is perfectly normal to be abnormal. Wallowing in self-pity about your supposed weaknesses is a trap that leads to burnout. Just go get some help from a medical professional and soldier on. I guess the same could be said about any health problem you have. High blood pressure, being overweight, diabetes, or whatever. Taking care of yourself first enables you to take better care of others.
Depression and Antidepressants
Let’s focus on depression for a moment. For the purposes of this lesson, there are two types of depression. Using up all your coping chemicals and clinical depression. They both have similar signs and symptoms and only a mental health professional could tell them apart. It doesn’t matter though the treatment is the same- antidepressant medication. Being a pharmacist I am such a medication freak. I just got to point out that many antidepressants work by blocking the reuptake of neurotransmitters in the brain. In plain English, it is making better use of the limited amount of coping chemicals to get the job done. Coping chemicals, depression, burnout- science is so cool, right? I do have to point out that messing around with your coping chemicals might make you less responsive emotionally. My wife took antidepressants and said it felt like being flat emotionally. It may seem like you are starting just not to care. If you notice this in yourself, it’s probably just the meds talking. But pay attention if it gets worse over time. Remember not caring is a warning sign for caregiver burnout. Talk things over with your doctor.
Compassion Fatigue
Compassion Fatigue is different than Caregiver Burnout. It is getting overwhelmed emotionally, physically, and spiritually after taking care of too many serious nursing cases. You’re not getting burned out, you’re just getting tired. You can tell the difference between the two by how fast the symptoms come on. Usually taking a break to recharge the caring batteries is all that is needed.
Social Isolation
24/7 caregiving really limits the amount of social interaction that you get. Lack of interaction with others can make you feel very lonely, insecure, and depressed. It also gives the caregiver a case of tunnel vision or living inside a bubble. You need to interact with others. It counteracts the loneliness, refreshes your batteries, validates your worth and you benefit by experiencing different points of view. If you can’t get out to mingle with people, then you have to get your people to come to you. Start inviting more people to come over. Have more parties or call your friends just to gab. Take  advantage of internet groups. Use things like Facebook as a tool to fight caregiver burnout.
For heaven's sake go to church. There is no better environment for a caregiver than an entire organization built on the principles of support and improvement.
Work Environment
The environment that you work in has a huge effect on the stress that you feel. Step back and take a real good at how your home is set up. Does it add to or take away from the pressure? Go through your home and redecorate and reorganize your procedures to maximize comfort and tranquility. Don’t forget calming scents and tranquil sounds in your efforts. Don’t be afraid to change things up just for the joy of it (holiday decorations come to mind)
Feeling Powerless
Studies show the number one issue that causes caregiver burnout is feeling powerless. You might feel trapped by financial considerations or feel stuck in a caregiver situation that you didn’t expect. These naturally lead to feelings of resentment and hopelessness. Don’t fall for that trap. That is a road that spirals down to caregiver burnout. Your situation may be limiting but you are never without the power to improve things, especially mentally.
- Practice acceptance- You may be in a situation that you didn’t choose, and you don’t like- but don’t get your nickers in a bundle worrying about it. Instead of spending your energy complaining, just accept things as they are. Use your precious energy to do things that bring you joy instead.
- You are not powerless to act- Action always wins out over doing nothing. Even if you make mistakes. Move on and try to improve the situation.
- Get creative, and think outside the box of your expectations.
- When there is nothing to do, don’t sit and veg too much. That leads to being a caregiver zombie. Take advantage of the lull in the action to do things that make you happy.
- Make a “Things that Make Me Happy” list. Gather the supplies you need ahead of time so you can do them when the opportunity arises.
The Good Stuff
 Let’s finish up by talking about some things that can give you more strength and power to carry on.
- Remember you are doing good. You made a conscious choice to sacrifice so that others may feel better. That makes you a caregiving HERO. That’s a lot more meaningful and satisfying than flipping burgers for a living.
- Think of what would happen if you weren’t there. More caregiver HERO stuff.
- If you are taking care of family members (especially parents) focus on the positive thought that you are repaying them for what they did for you.
- Talking about things helps. Find someone you can trust that you can complain to. Do not suffer in silence.
- Blow off some steam by doing active things. Get an active hobby. Watch a sport or a movie that gets you excited.
- GO TO CHURCH. Even if you must pay someone to babysit.
- Set aside a private place. Stock it with personal pampering things. This is not a luxury. This is a necessity.
- Establish some boundaries where caregiving cannot cross.
- Scented candles, incense, or a pot of steaming cinnamon water are wonderfully refreshing. So is calming mood music.
- Budget money to hire help. You don’t have to do everything. In fact, you shouldn’t do everything.
- Learn to say NO. More of that you don’t have to do everything again.
- Budget time and money for away time. Vacations are just not for other people. Even little mini vacations like going out to eat or taking in a show are worth their weight in gold.
- Daily exercise or yoga reduces stress.
- Puzzles fight boredom and are an easy way to escape pressures.
- Read a book. Reading a book creates a mental space where caregiving cannot enter.
- Have some pride in what you do. You are a caregiving powerhouse. No one else spends more time with patients than you. No one is more knowledgeable than you are about how your residents act and feel. No one is a better advocate for the patient than you. Who else can chew out a doctor and get away with it?
- Be realistic, you can’t cure everyone. Sometimes you can’t even keep someone stable.
- Talk to a professional, such as a therapist, social worker, or clergy member.
- Find caregiver support groups or workshops that can help you find ways to manage stress.
- Regularly take personal assessments. Think deeply about the Whys of the events around you.
- Go to the computer and type in [the diagnosis of your resident] and caregiver support.
Here are some other resources that you might find useful
Conclusion
You are a wonderful person. Thank you for sacrificing to take care of those in need. Be careful not to expend all your energy doing so. You are too valuable a resource to the rest of society to be wasted by overtasking yourself. Be mindful of your coping chemical supplies. You can tell when you’re running low by how drained you are and how easily you become grouchy. Develop a plan of action. Purposely and continually work on the plan you have developed. The rest of us want you to be where you are doing good for the long haul.
As always Good Luck in your Caregiving efforts.
Mark Parkinson BsPharm
PS
Did you notice that this entire lesson could be titled How to Run Your Business Better and Out-Compete Your Competitors? This is the “Secret Sauce” of good caregiving guys and gals. You won’t get this stuff from other CE sources. (another shameless plug for my service) If you already know all this stuff, good for you. I apologize for boring you. At least you got 3 hours of CE out of the way.
References:
- The Stress-Diet Connection. Health & Nutrition Letter, Tufts University, July 22, 2021. https://www.nutritionletter.tufts.edu/healthy-eating/the-stress-diet-connection/
- Mental Health Effects of Unrealistic Expectations. WebMD.com Feb 25, 2024. https://www.webmd.com/mental-health/unrealistic-expectations
- Moshe Ratson. How to Manage Expectations. Psychology Today, Sept 20, 2023 https://www.psychologytoday.com/intl/blog/the-wisdom-of-anger/202309/how-to-manage-expectations?msockid=0d79d8cfe18b638f2bbacdd4e084623a
- Caregiver Burnout. ClevelandClinic.org, 08/16/2023. https://my.clevelandclinic.org/health/diseases/9225-caregiver-burnout
- Avoiding Nurse Burnout Nursing CE Course. NursingCE.com, 06/13/22 https://www.nursingce.com/ceu-courses/avoiding-nurse-burnout-nursing-ce-course
- Elizabeth Scott. The Expectations vs. Reality Trap. VeryWellMind.com, Apr 18, 2022 https://www.verywellmind.com/expectation-vs-reality-trap-4570968
Exam Portal
click on [Take Exam]
Purchase membership here to unlock Exam Portal.
*Important*
Registration and login is required to place your name on your CE Certificates and access your certificate history.
Username MUST be how you want your name on your CE Certificate.